
Summary
Never be out of fashion with this fully customizable designer wallet, where YOU are the designer!
Design your perfect wallet with this 100% printable modular, interchangeable soft print-on-fabric and TPU wallet design. Includes designs for bi-fold, tri-fold, and no-fold wallets, and a gift box so you can give them as gifts to your family or loved ones. Makes a great Father's Day gift!
Please note, this is a SEWING project, but it’s easy.
Materials
Print-on-Fabric with Fabric Interfacing:
- Fabric + Interfacing*
- Printed fabric or other cotton fabrics
- Pellon 950-F ShirTailor Interfacing
-OR-
No Interfacing Required:
- Canvas
- Faux Suede
- Faux Leather
-OR-
TPU-only Print:
- Filament: TPU-95A or softer
* What is interfacing? Can I skip this step?
No, you really shouldn’t skip this step. You will NEED interfacing for this project or else you will have strings hanging off your wallet. The TPU printing process does not entirely eliminate fabric stringing. To use fabric interfacing, buy the recommended type of interfacing (others will work but I’m not sure which because I only use the 950-F) and iron it onto the back of your fabric. After you have secured the fabric with interfacing, you will have a surface that is both smooth enough and strong enough to print on.
If you don’t want to use interfacing you can use either suede, faux leather, or just simply print without fabric. Printing on fabric without interfacing WILL lead to strings hanging off your wallet. You have officially been warned.
TPU-Only, No Fabric
This design can be printed in TPU only without printing on fabric at all. However, most of the reason this design works is because the smaller grain of the fabric or faux-leather holds the stitches in place. If you’ve chosen not to use fabric at all, you’ll need to use an overhand stitch and thicker thread. Instead of stitching the wallet as shown in the pictures, stitch over the outside of the wallet, creating top loops. While this stitching may not be preferred for looks, it will help keep your wallet panels from being loose.
Instructions
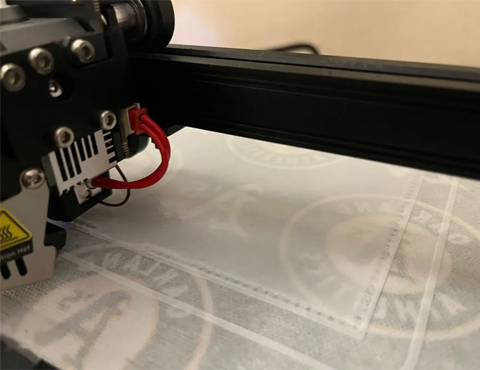
Printing the Wallet Base
Lay the fabric down on your print bed, secure with clips, tape, or clamps. Align the design to the position you want in your slicer (being aware of where on the fabric the design will be place) and print as normal. Do NOT re-level your bed after you’ve put the fabric on. Print with the most recent previous mesh. It does help to level the bed before putting the fabric down though.
Printing Your Own Fabric
If you'd like to make your own fabric designs, follow this tutorial from the lovely Phoebe Moon Designs and then line the fabric with interfacing on the unprinted side. 3D print according to the instructions above.
Printing Panels
There are several panel options. Print only the panels you need. I will list the most common panel configurations below, but you can customize this in any way you’d like. Print in TPU-95A or softer. The panels do not need fabric applied but if you choose to apply fabric, print them on the smallest panels. Printing fabric on all panels is not necessary but will work.
Configurations
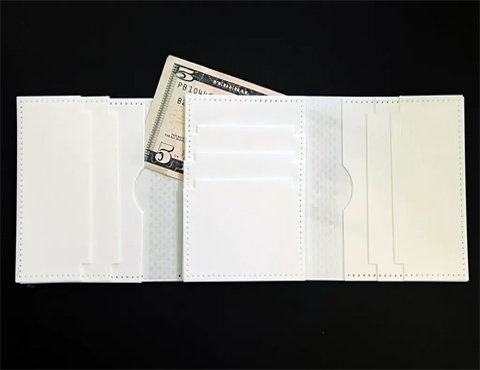
Bi-Fold Wallet
- 1 Bi-Fold Wallet Base
- 2 sets of Horizontal Panels
Tri-Fold Wallet (requires a large format printer)
- 1 Tri-Fold Wallet Base
- 1 Bi-Fold Wallet Base (for bill pocket)
- 1 Set of Vertical Panels or ID Panel
- 2 sets of Horizontal Panels
No-Fold Wallet
- 1 Set of Vertical Panels
- 1 Set of Horizontal Panels
Luggage Tag
- 1 ID Panel
- 1 set of Vertical or Horizontal Panels
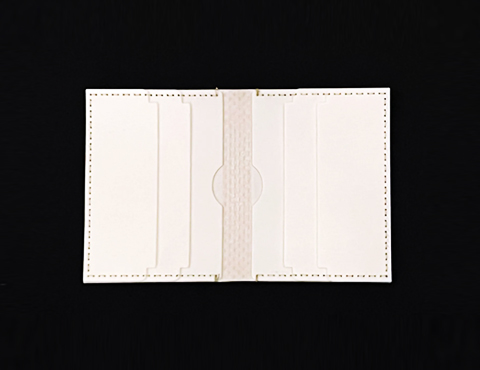
Assembly
Depending on the materials you used for your wallet, you’ll need one of the following construction methods. Most are similar stitch patterns, except for the TPU only variant which will require a different stitching.
- Use binder clips to hold the panels in place
- Stitch the first hole and tie several knots to secure it
- Loop thread around five times before starting the first stitch
- Loop thread around five times before starting the first stitch
- Tie the last hole off the same way you tied off the first hole
- Repeat on the other side
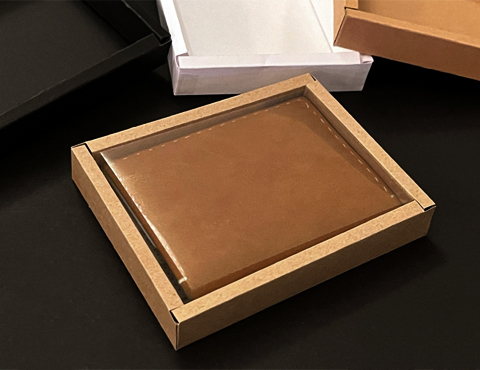
Gift Box
I have provided SVG files for a gift box so that you can give this wallet as gifts to your family and loved ones. To make it easier, I have created these files in Cricut Design Space as well.
Download Files
3D Printing Files (STLs)
Gift Box SVG
Open in Cricut Design Space
Licensing
This pattern is FREE for personal use and may not be distributed for sale.
This project is intended for home use, such as father's day gifts or making a customized wallet for your self or your loved ones. As such, it is not designed for mass production. If you'd like to sell these wallets in low volume, please contact me for a commercial license. If you need higher volume, this pattern may not be for you. There are cheaper and less labor intensive ways to make a wallet. However if you're insistent, I'm sure we can work something out. Please contact me.